Sailomat Installation
One of the first projects on Cats Paw was adding a Sailomat 601 self-steering windvane. We did this because of our overall goal of keeping the boat relatively simple. If we were to rely on the electric autopilot, we would not only have to bring along a full complement of expensive spares, but we would be totally dependent on electrical power. The Sailomat is easy to repair and requires no power.
Because we wanted to be able to use the wonderful swim ladder on the back of the boat, we mounted the Sailomat slightly off center (about 25cm to starboard). This required specifying a slightly longer than nominal oar.
Here's an aft view (click for larger picture).
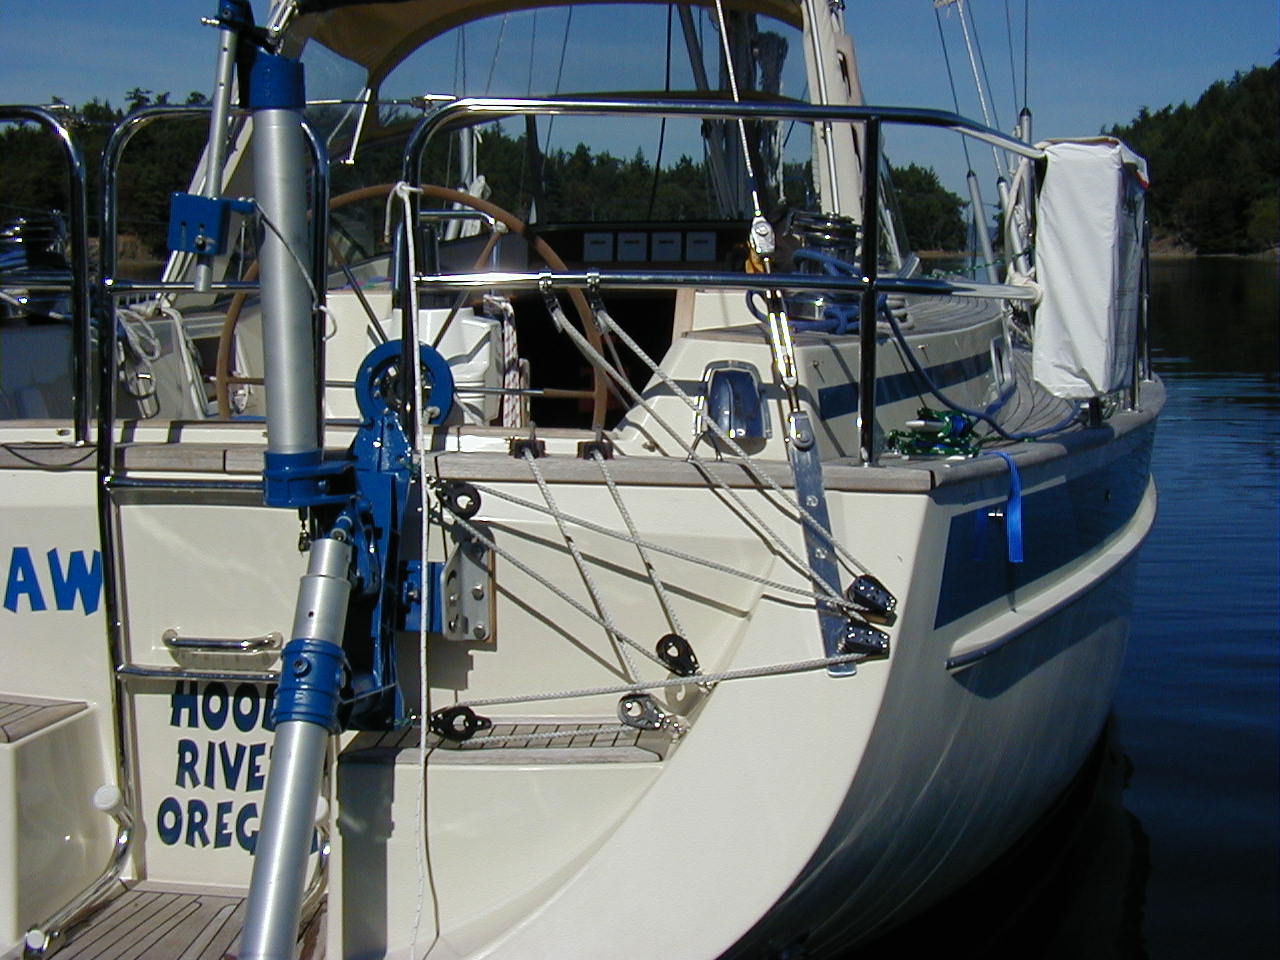
Note that the control lines were led from both sides of the pendulum (above and below), thus avoiding having a line crossing the ladder.
Here's a view from above.

The blocks on the left of the photo are Harken cheek blocks, mounted on custom teak pads that tilt them just so to avoid chafe. The blocks (not entirely visible) at the very bottom of the picture are rail-mounted Schaefers. The cam cleats are used to engage and disengage the windvane. A very low-stretch, slippery line was used.
Finally, here's a view from within the cockpit.
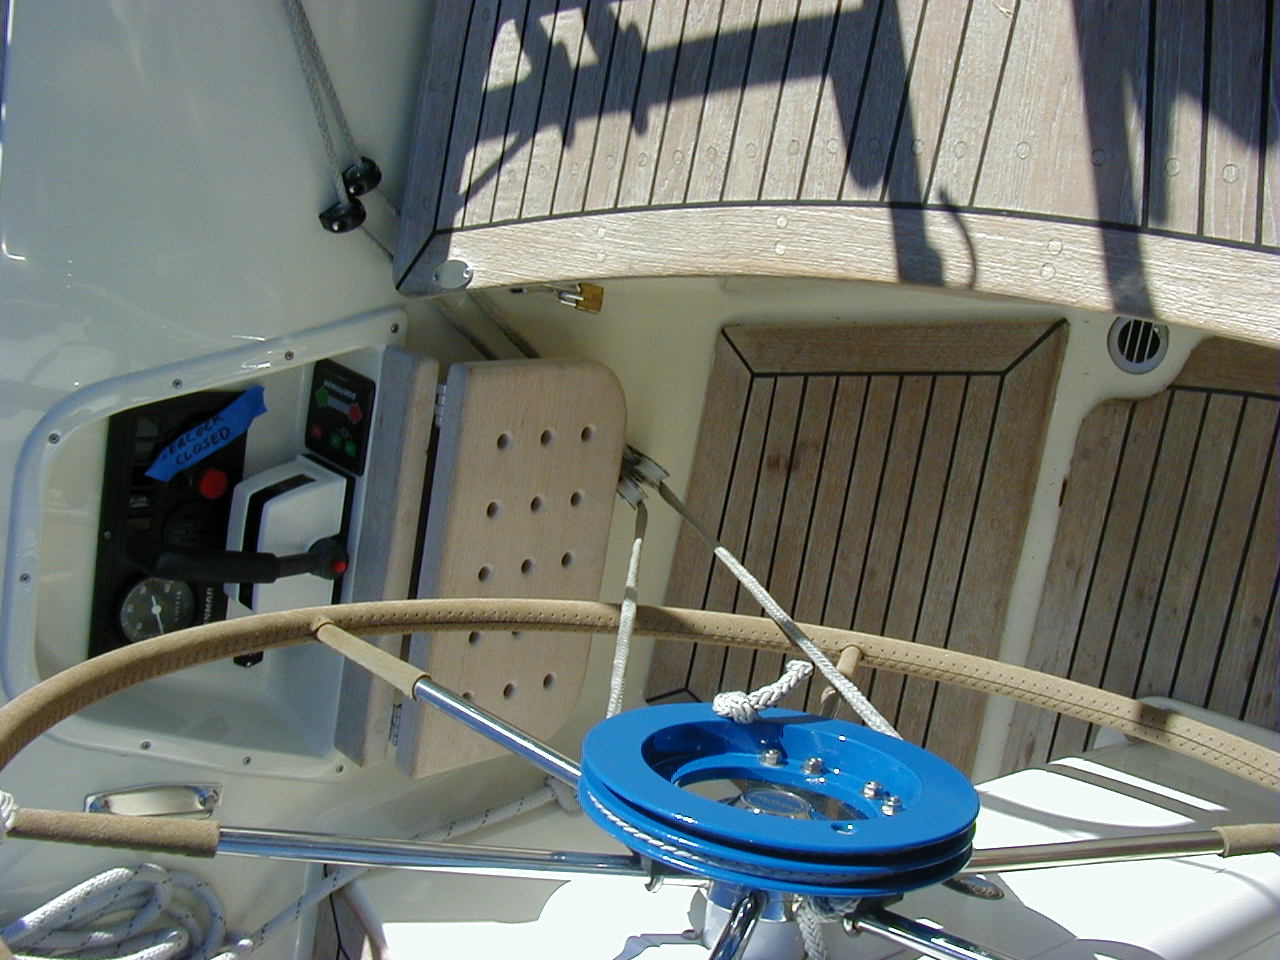
Each line is fed from the Schaefer blocks on the rail, through a bullseye, and then to a Schaefer block near the cockpit sole. By doing it this way, I am still able to open the lazarette cover, as well as use the fold down seat, while using the Sailomat. Plus, the lines are generally low and out of the way. The blue sheaves on the wheel are an optional Sailomat accessory. The sheaves are mounted by using some carefully fitted nylon shims and u-bolts.
Hal Thesen of Lummi Island, Washington, helped me on the installation. Well, maybe it would be more accurate to say that I helped him.