Adding a radar pole
With the addition of a radar, I needed someplace to mount the radome. The mast was out: there's no point in having a carbon-fiber mast then ladening it with heavy stuff high off the deck. Besides, drilling into carbon-fiber is a Big Deal and must be done very carefully, lest it get weakened.
I've never liked backstay mounted radomes as they can "work" the backstay as the boat rocks, weakening the stays and fittings. If a leveler is added (the usual case), the cables also get worked and can result in mysterious faults.
So, that leaves a radar pole. I don't really like the big struts that hold deck mounted poles up — they get in the way and are ugly — so I thought I'd try for a freestanding pole. This meant the pole had to be mounted through the deck. It would be supported by a "bury tube" laminated to the hull, plus the cutout through the deck.
The stern of a J/42 is rather delicate, only about 30 inches high, so I was a little worried whether this would be enough height to firmly hold the pole. I figured that if it "wiggled" too much, I could always add some struts later.
After looking around, I settled on a Seaview pole from PYI in Lynnwood, WA. I liked that they were local, simplifying the shipping and customer support. Plus, having bought two Maxprops from PYI, I knew they had great customer service. I settled on an over-sized 4" aluminum pole, figuring the extra width would minimize any bending, 10 feet long. PYI also made a custom mount for the radome, GPS antenna, and AIS antenna. They put on an extra stud should I get a satellite antenna at some future date.
I also got a 24" "bury tube" that would be laminated to the hull to hold the butt of the pole. The inside diameter of the tube is "slightly" greater than 4". It would be nice to have had a snugger fit, but on the other hand, this will make it easier to extricate the pole should I ever need to do so.
A piece of 1/2" marine plywood cut in an 7" circle, was laminated to the underside of the deck as a backing plate, to increase the strength of the deck in this heavily loaded area. Unfortunately, I didn't take any pictures of this step.
Generally, polyester resin and fillers were used to bond the various pieces to the hull and deck. While not quite as strong as epoxy (though strong enough) it has the huge advantage of hardening in much less time. This allowed 3 or 4 bonding cycles in a single day instead of one.
All-in-all, the pole turned out very well! A strong guy can wiggle the top perhaps an inch or two, but all of that is from the bending moment of the 10 foot aluminum pole; none of it from movement where the pole is held. However, I think the 28" I had to work with below decks is the bare minimum. If you have less space, you should probably use a couple of supporting struts.
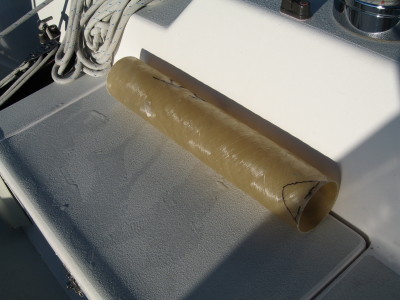
The "bury tube." It's actually a piece of fiberglass exhaust pipe. The magic marker marks on the right are the beginnings of what will be cut out to miter the tube to the curve of the hull.
Looking aft, starboard side, at the transom. This is where the pole will go. The curving line at the bottom is where the hull coring ends.

The fantail where the pole will go. We've drilled a small pilot hole to make sure everything will fit. The string goes to a plumb bob shown in the next picture.
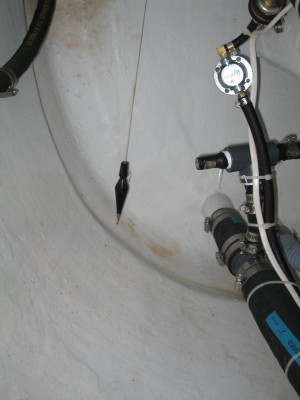
Here's the plumb bob. It's not very "plumb" because I didn't hold the camera straight when I took the picture! Using the bob allowed us to make sure the pole would fit correctly before committing to some big holes.
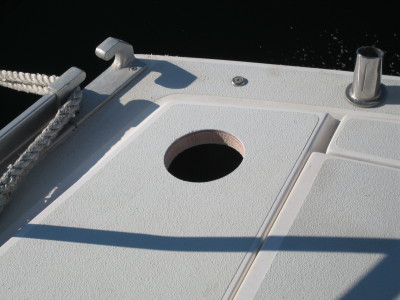
The four inch hole into which the pole will go. You can see the balsa coring inside.
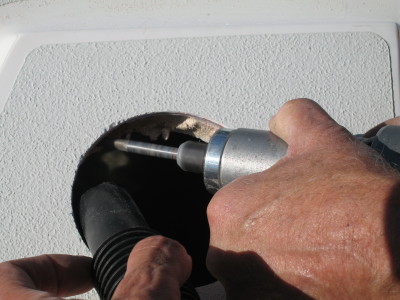
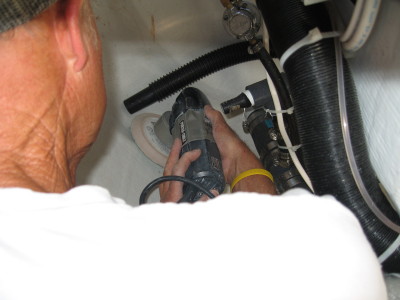
Grinding out the balsa core using a die grinder. The hose at left is to a vacuum cleaner to keep the dust down.
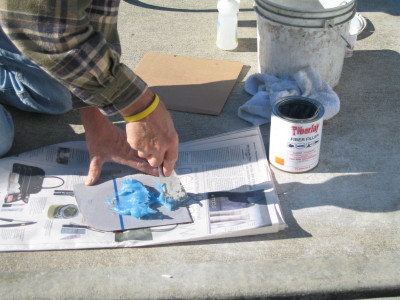
We used Fiberlay, a polyester filler with chopped fibers, to fill in the ground out core.
Filling in the ground out core, using a tongue depressor.
This is the back of Charlie's neck: the only picture I have of him! The bury tube will be laminated onto the hull, but first the area has to be ground back to bare fiberglass to make sure it will adhere.

Swiss Glas was used to bond the bury tube to the hull.
The bury tube tacked onto the hull using just a bit of Swiss Glas. This is the tricky part of the operation. You've got to make sure the tube is absolutely plumb. We did it by putting the radar pole in it, measuring with a level, then hand holding the pole until the Swiss Glas hardened. Putting a bit of extra catalyst can speed the process.
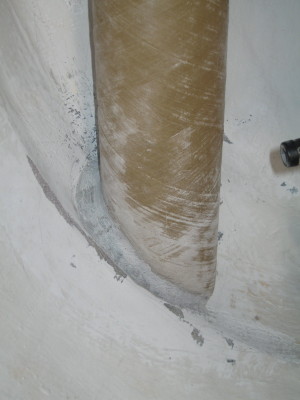
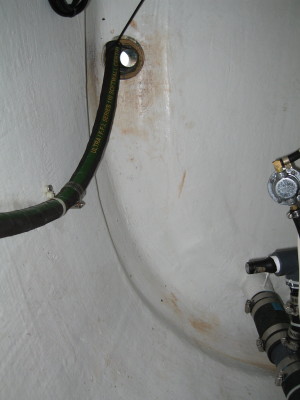
Here's the bury tube, now with a full fillet, bonded to the hull.
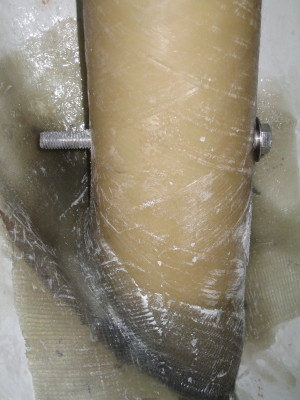
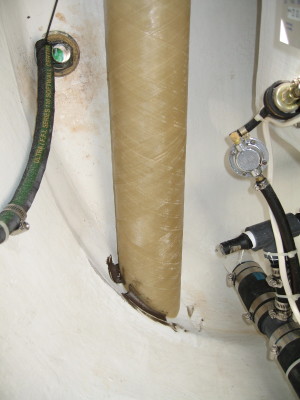
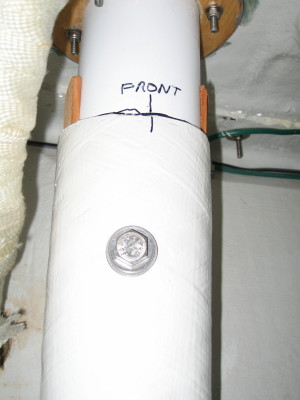
After adding a layer of fiberglass, bonded using polyvinyl resin. The pole is held in place off the bottom with half inch bolts. The exit hole for the wires is at the bottom right (not seen).
The finished pole in place, after painting with gelcoat to match the inside hull. You can see the two half-inch bolts that hold the pole in place. They are at right-angles to each other. You can also see where the wires exit at the bottom of the bury tube.
Details at the upper part of the bury tube. At the very top, you can see the 1/2" plywood laminated to the underside of the deck, as well as some of the bolts used to hold the trim ring down. You can also see the two cedar shims wedged in to prevent any rattles.
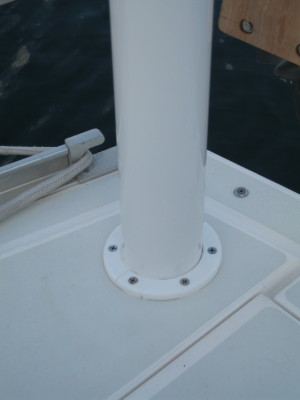
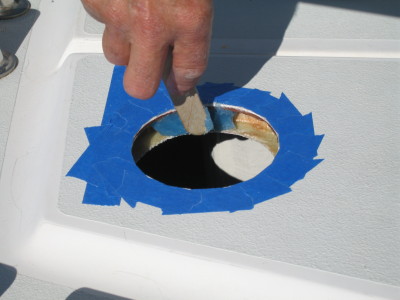
Where the pole exits the deck. The StarBoard trim ring is shown. There is an o-ring around the pole and under the ring (not shown), which supplied addititional structural support. Polysulfide caulk was used between the pole and hole, insuring a leak-free fitting.
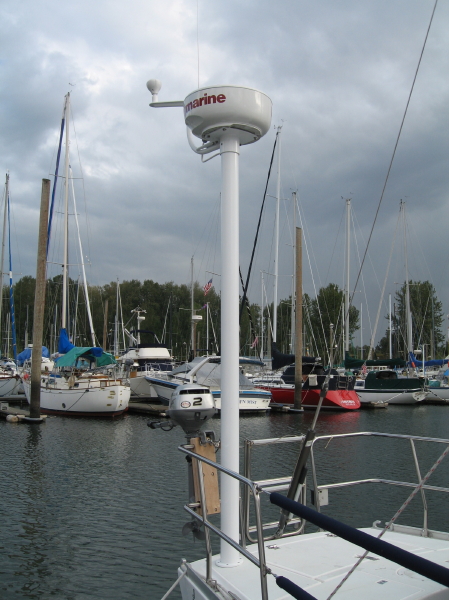
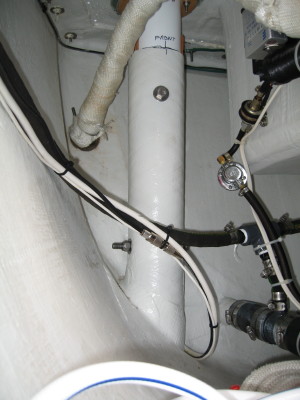
The finished pole in place. Look Ma! No struts!
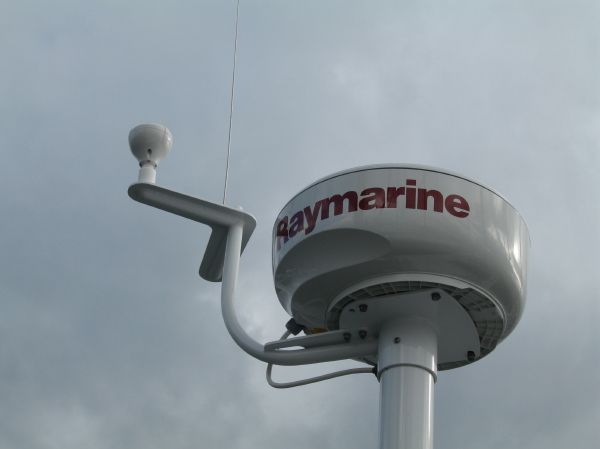
The "Starship Enterprise." The "boomerang" on the left holds a GPS antenna (shown) and the AIS antenna (partially hidden). It was custom made by PYI.
Lessons Learned
The project went reasonably smoothly, but there were a few glitches.
The deck at the fantail is slightly cambered. This means that when you drill the 4" hole through the deck, you are not drilling perpendicular to the surface, but at a slight angle, so that the drill bit is plumb and straight up. This wasn't a big problem, but when it came time to drill the 4" hole in the marine plywood that was to be laminated to the underside of the deck, we just blindly drilled, well, a 4" hole, forgetting that it had to be at a slight angle. Once we laminated the piece onto the underside of the deck, we realized our mistake. This meant we had to grind the backing plate a bit to get the pole to fit.
In retrospect, the easy way to solve this problem would be to laminate the plywood first, then drill the 4" hole. That way you get a clean hole through both the deck and backing plate, all in one swoop.
The easy way to drill the holes for the 1/2" stainless bolts that hold the pole in the bury tube is to first drill just a hole through the bury tube in a convenient place. Then put the pole in and mark where this hole will be on the pole. Take the pole out and using a good workbench, drill at the marking, all the way through the other side, taking care to center the holes. Put the pole back in, then using the two new holes as guides, drill through the other side of the bury tube. This will insure a perfect fit. Now the pole will be held firmly, so doing the second bolt is easy: just drill all the way through the four layers.
The pole is held very rigidly by the two 1/2" bolts I used through the bury tube and the compression fit from the o-ring on the deck under the trim ring. Still, to be sure, I also hammered in a couple of cedar shims as "partners" to hold the pole firmly in the bury tube.
The "boomerang" supplied by PYI is a work of art, but it came with no messenger lines, making it hard to snake the wires through for the GPS and AIS antennas. Tying a nut onto a thread and using gravity to work it through the tight twists and turns in the boomerang solved this problem.
Oh, and don't forget to put the o-ring on before erecting the pole. Would I forget something like that? Nah!
Thanks
I hired Charlie Millsap, a local shipwright in Bellingham, for a day and a half to help me with the fiberglass work. He was awesome! We finished in 8 hours what would have taken me at least 5 times as long to do. He knew the right materials and "tricks of the trade" to get the job done efficiently. Thanks, Charlie!
Thanks are also due to an unnamed passerby in Bellingham who helped me in my "Iwo Jima" moment when it came time to lift the pole and slip it into its tube! The pole is not very heavy, but with the radome on the end, it has quite a moment arm, so it was a bit of a struggle. Whoever you were, I couldn't have done it without you coming along at the right moment!
Thanks also to my friend Robert Henry who helped me with the trim ring and caulking.